Micro:bit Block Programming:
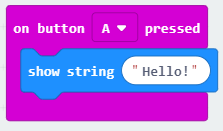
Hello World
Conditional Statements
Conditional statements are prevalent in every programming language because they have a multitude of uses. The idea behind them is that IF a condition is true, THEN another action or block of code will execute. In general, conditional statements take the following form:
  if(something is true):
     then do this
  else if(some other thing is true):
     then do this instead
  else:
    do this instead
Conditional statements also tend to be pretty flexible concerning this structure. You could just have the “if something is true” part. Which can be referred to as an if statement.
  if(something is true):
    then do this
Alternatively, you could have an if...else if statement.
  if(something is true):
    then do this
  else if(some other thing is true):
    then do this instead
Another option is to have an if...else statement
  if(something is true):
    then do this
  else:
    Do this instead
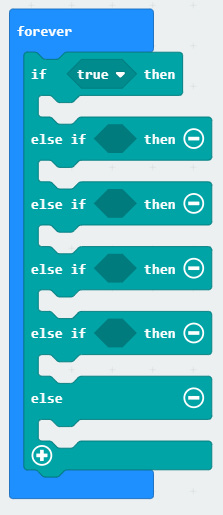
Finally, you can have a varying number of “else if” parts to create an if...else if...else if...else if ... statement.
  if(something is true):
    then do this
  else if(some other thing is true):
    then do this instead
  else if(some other thing is true):
    then do this instead
  else if(some other thing is true):
    then do this instead
  else if(some other thing is true):
    then do this instead
  else:
    do this instead
Note that there is a difference between having two if statements one after the other compared to having and if...else if statement.
  if(something is true):
    then do thing1
  if(something is true):
    then do thing2
When we have two if statements back to back, it is possible that both thing1 and thing 2 will happen. When we have an If...else if statement, either only thing1 or thing2 or nothing will happen. Both thing1 and thing2 cannot happen with an If...else if statement.
  if(something is true):
    then do this
  else if(some other thing is true):
    then do this instead
In the make code environment, conditional statements look like the following image and are found under the Logic tab.
The number of “else if” parts can be controlled by the + and - symbols on the block.
Inputs
Another useful construct for the micro:bit can determine if each button (button A or button B) is pressed. The block to do this is found under the Input tab. By default it shows on button A pressed, but the A can be changed to B.
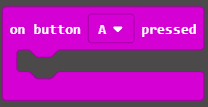
Notice that this block doesn’t connect to the inside of other blocks. It does however allow you to connect blocks on the inside of it. Thus, when the A button is pressed, the blocks on the inside will be executed.
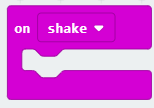
Another commonly used Input is called “on shake”. This block detects if the micro:bit is shaken and then performs the code on the inside of the block if so.
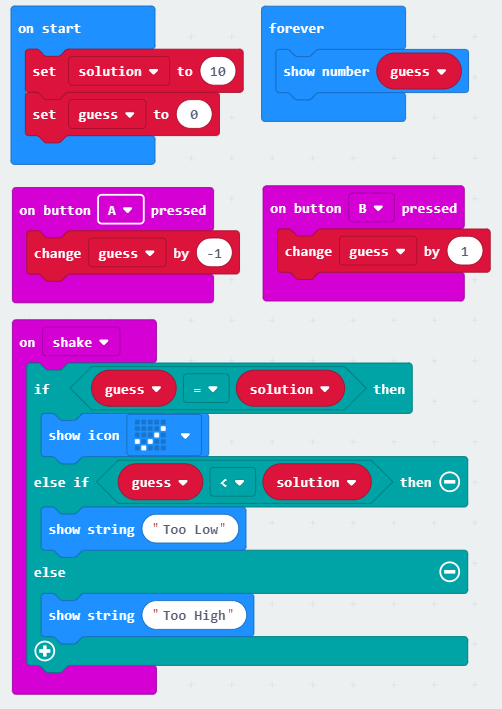
Guessing Game
Use variables, conditionals, and the buttons to create a number guessing game.
Create the following variables
- Variable Name: solution. Purpose: to store the value of the number you are trying to guess.
- Variable Name: guess. Purpose: to store the value of your current guess.
On Start
- Set the value of the variable solution to 10.
- Set the value of the variable guess to 0.
Forever
- Show the current value of guess.
On Button A Pressed:
- Change the value of guess by -1.
On Button B Pressed:
- Change the value of guess by 1.
On Shake:
- Use a conditional statement to:
- First check if guess = solution, if it is, then show the icon of a check mark
- Otherwise if guess < solution, show the text “Too Low”.
- Otherwise, show the text “Too High”.
Guessing Game Solution